How to Set Pipe Slope from an Elbow: A Professional Drainage Guide
In a drainage or sewage system, correctly setting the slope from an elbow directly affects whether the fluid can flow smoothly through the directional change point. Many field failures originate from “reverse slope” or localized high points downstream of the elbow.
1. Why are elbows prone to errors?
✅The elbow itself does not create slope; it only changes the flow direction. When a pipe transitions from vertical to horizontal (e.g., at the base of a stack), if the starting point of the horizontal run does not immediately achieve a sufficient downward slope from the elbow outlet, solid debris will settle near the elbow. For a 45° elbow, often used to create an offset to bypass a beam, the elbow offset slope method must be applied to ensure that the horizontal pipe sections before and after the offset maintain a continuous downward grade, preventing the formation of a water pocket.
2. Slope parameters and calculation example
✅According to IPC Chapter 7, the minimum slope is tied to pipe diameter:
-
3 inches and smaller: 1/4 inch per foot (2.08%)
-
4 inches: 1/8 inch per foot (1.04%)
✅Example: A 90° elbow connects to a 12-foot-long horizontal drain pipe (3 inches in diameter). The total vertical drop required is 12 × 0.25 = 3 inches. This is a typical drainage pipe slope calculation. If the measured drop is less than 3 inches, the hanger height must be adjusted or the elbow outlet repositioned.
3. Special treatment for vertical-to-horizontal transitions
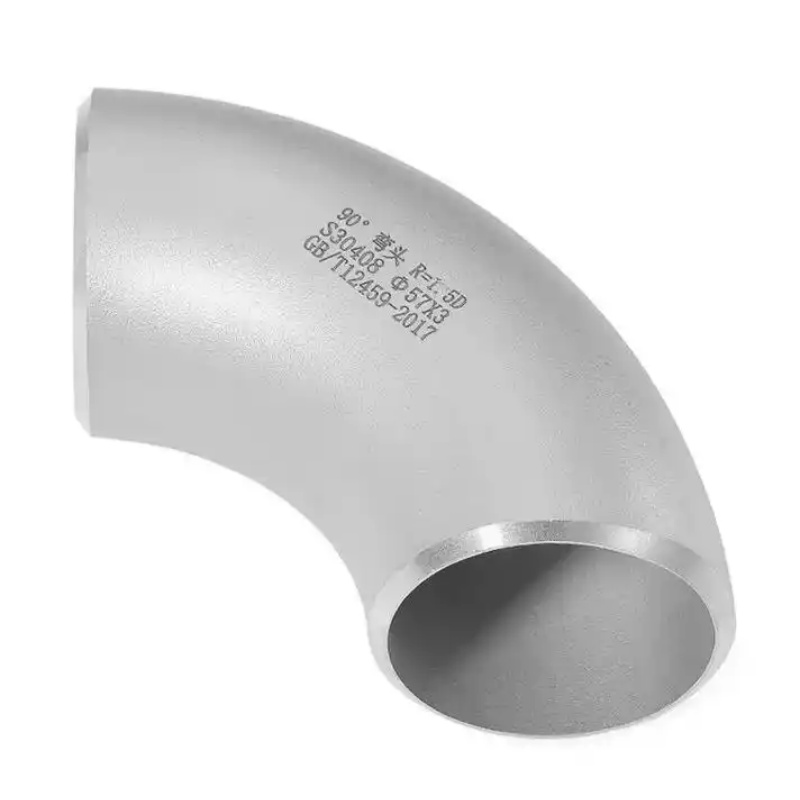
✅The vertical to horizontal pipe slope transition is a high-risk zone for blockages. The flow velocity in the vertical stack is high; upon striking the elbow, it suddenly decelerates, making solids prone to settling. Authoritative recommendations: Install a cleanout within 1 foot downstream of the elbow, and ensure that the starting slope of the horizontal pipe is no less than 2%. Additionally, prefer long-radius elbows (R = 1.5D) to reduce hydraulic resistance.
4. Construction steps and common mistakes
✅Procedure:
① Determine the design slope (e.g., 1/4″/ft). Use a spirit level or laser to mark a reference point at the elbow socket.
② Install the elbow, then pull a string or place a straightedge from the outlet end, measuring the vertical drop every 2 feet along the flow direction.
③ When making an offset to bypass an obstacle, perform a dry fit on the ground to verify that the total drop after the offset continues the grade.
✅Common mistake:
Forcing pipe to align with the elbow by stretching creates misalignment at the joint, artificially creating a local high point. ASME B16.9 emphasizes that butt-welded or socket connections must have natural axial alignment.
📝Summary
Correctly establishing slope from an elbow hinges on “continuous measurement and execution according to standards.” Applying the calculation methods and parameters above, together with AIFN‘s high-precision elbow fittings (ISO 9001 certified), can significantly enhance the long-term drainage reliability of the system.